Bathroom Cleaning Tips
Windows and Mirrors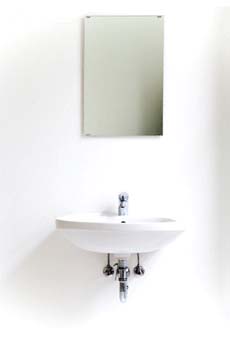
If your having trouble cleaning windows and mirrors without them streaking, try changing the brand of your glass cleaner. We have discovered that sometimes "New and Improved" means "Not as good as the original stuff". Also, be sure to use two paper towels (or rags, whichever you use). One to clean the mirror and another one to dry it to a streak free shine.
Tubs and Shower Stalls
Keeping soap scum at bay
Alkaline deposits in the water cause spots on your glass doors and shower walls. Apply a car wax to the walls and doors, but not the floor or it gets real slick. Both fiberglass and glass are porous. The car wax seals those pores, which make cleaning easier and keeps water spots away. Reapply twice yearly.
Squeegee or wipe down your shower after each use to further prevent buildup. If you're tired of fighting soap scum buildup, switch to a liquid soap, natural soap or Dove®. It's the talc in most bar soaps that cause the buildup. Changing soap can eliminate the buildup. You still need to clean the shower once a week, but the job is easier.
A word about plastic shower curtains
Plastic shower curtains can be machine washed. Remove, spray with a bathroom cleaner such as Dow Scrubbing Bubbles® and wait about 10 minutes. Wash with your rags and they come out quite clean. Air dry. If the curtain is long enough, cut off the seam at the bottom to prevent mildew buildup down there. Also, if you get the kind of curtains that have two parts, a pretty fabric for the facade, and a plastic liner behind, the plastic liner can be easily changed. Most dollar stores carry clear plastic liners for a dollar, we recommend changing them as they become stained. This will also help keep mildew under control.
Toilet Bowl Rings
Ring around your toilet? Again, alkaline deposits cause those nasty rings. Depending on the hardness of your water, pour one or two cups of bleach into the toilet once a month to eliminate the problem. You can also get those bleach discs and place one in your toilet tank to help with this problem. Just drop one in every two to three months and it will dissolve and help out with each flush.
Neglected toilets may have caused a nasty ring to form that is harder to get out. Here, you will want to put on a pair of gloves and get yourself a green scrubbie. Try to find one that does not have a yellow sponge attached to it. The sponge will act as a cushion and absorb the pressure your trying to apply. Pour in your bleach, and scrub until the ring is gone. (note: always use water with green scrubbies, the water acts as a lubricant and will help so that you do not scratch your toilet. Never use scrubbies or brillo dry! And always use gloves when handling bleach products!)
Keeping Silicone Caulking Clean
Silicone caulking is most commonly used around the edges of a bathtub and shower, or around sinks and faucets. When applied correctly, it should blend with the rest of your tile or grout. Keeping your silicone caulking clean will prevent mildew and mold from growing in your bathroom.
Cleaning Silicone Caulking
Regular cleaning of the silicone caulking around your tub and sinks can help prevent water damage to the caulking or from leaks behind the caulking. Damage from caulking that has failed because of failure to keep cleaned and maintained can cost thousands of dollars in repairs.
Keeping it all mold free!
Every few months go over the silicone caulking with a Tilex Mildew Remover or a mixture of 50/50 water and bleach. Spray down the caulking and scrub with brush. Any mold that is getting started will be killed. For deeper stains, then leave the solution on the caulking for at least 10 minutes before scrubbing with a soft brush.
How to replace your caulking
Because of its properties, silicone caulking will begin to break down and lose its holding power. Once this happens you will need to scrape up the old caulking and replace with new silicone caulking. Make sure the area is completely clean, and dry, before reapplying new caulking. If this is neglected, mold can get behind the walls and infect your walls causing you to have to replace sheet rock and the wall behind your shower wall.
What you will need:
A putty knife, paper towels, painter's tape, something to cut the end of caulk tube, wire spear to puncture the tube, your finger (or a plastic spoon, see step 5) caulking cartridge and caulk gun.
Step 1
Use a putty knife to clean any old caulk from the joints to be caulked. Be thorough as old caulk may cause the new caulk adhere poorly.
Step 2
Keep a few paper towels handy to wipe your fingers. Clip the cartridge nozzle off at a 45-degree angle in the cutting slot of the caulk gun, use the wire spear to puncture the tube and load the cartridge into the caulk gun.
Step 3
Use painter's tape to define both edges of the caulk bead. Apply the tape on both sides of the crack or seam before applying the caulk. This saves cleanup time and gives a perfect edge.
Step 4
Begin caulking at one end of a seam or joint. Use steady pressure on the caulk gun trigger and hold the tube with your other hand as you lay down a continuous bead of caulk along the joint or seam. When you reach the end, release the pressure on the cartridge to stop the flow.
Step 5
No tool is better for smoothing the caulk than your finger. Wet the tip of your finger and gently run it across the bead of caulk to smooth it out; don't stop until you reach the end. Wipe the excess caulk off your finger with a paper towel. An alternative to using your finger is a plastic spoon, pressing the convex edge against the caulk bead. This step is most important. Many do-it-yourself homeowners forget this step. Forgetting this step will create a ledge for water to sit and mold will form in the cracks, which is what we are trying to avoid by placing the caulk there to begin with.
Step 6
Clean up before the silicone caulk dries. Remove the tape carefully. Use some rubbing alcohol on a paper towel to remove any film left behind. Even if you can't see it, follow this step as it will be visible once it dries.
|